Pros Guide to Posing Arms in Portraits

The arms are a part of the body with practically endless possibilities in range of motion. However, relatively few of these are going to look good in a portrait setting.
Posing arms is particularly important as they are included in nearly every portrait you will ever take. They are a prominent part of creating not only mood, but also the lines or composition of the portrait. In this article, we've compiled a few easy tips for you.
The First Rule of Photo Club...
These are not hard and fast rules as much as they are best practices to keep in mind. Part of creativity is breaking outside the norm. However, it is almost always a good idea to become familiar with the rules and principles of your craft before you push yourself beyond the boundaries of those principles. For example, it would probably be best to learn to ride a bike on two wheels before you attempt to pop a wheelie.
Repetitive and Redundant
You will see some principles repeated for various posing situations. We will mention these principles where they apply. Repetition is good for memory as well.
Keep Away!
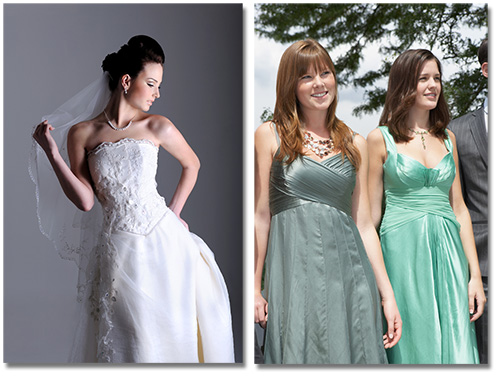
If you remember only one thing about posing arms, it should be to keep them away from the body. Bring the elbows out, away from the body. When arms are so close that they close the gap between the body, then the arms essentially become the body. Using the bent elbow to create a diamond shape between the torso and the arm can have a slimming effect. Keep the arms triangular, but try to avoid putting the arms at ninety degrees.
As always, if it bends, then bend it. Angles are interesting. Straight lines are boring.
As with hands, you want to keep arms on the same plane that is parallel to the camera. This avoids foreshortening which makes the objects appear larger the nearer they are to the camera.
It’s often best to pose the upper arms before the lower arms since they have more impact in creating a triangle or pyramid effect within upper body shots.
If you are going to use unusual arm positions in a portrait, you should know exactly why that particular position is needed. For example, arms raised high would look ridiculous in most portrait settings. But if you’re trying to indicate a sense of victory or perhaps an exuberant attitude, then the pose would be proper for that situation.

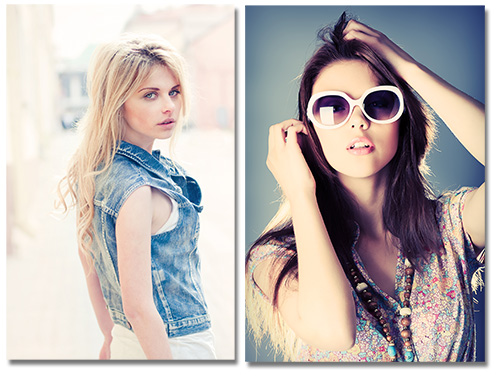
If your subject’s arms are folded, the most intuitive and comfortable pose for them, will not likely be the most aesthetically pleasing. You should instruct them to hold their arms slightly away from their body with both hands visible. This is one of the more ignored principles in the portrait world, but it goes a long way toward a pleasing image. If you feel you must hide the hands, hide them both.
When a subject is leaning on something, make sure their weight is on their elbow or hands. Putting weight on the soft part of the arms will an unflattering arm bulge at the point of contact.
You should avoid sleeveless clothing in traditional portraits. Our eyes are drawn to skin and, in portraits, the eyes are usually the point of desired focus. Bare arms as well as bare armpits will detract from the eyes. Therefore, it is a good idea to mention this in your clients’ checklist before the shoot to avoid tank tops and other sleeveless clothing.
If necessary, arms can also be used to hide problem areas such as potruding belly or a double chin. Just ensure the pose looks natural or it could have the effect of drawing attention to the area that was intended to be covered up.
This last principle is more of a compositional recommendation, but there is a posing aspect to it as well. Always be sure to crop between joints, and not at them. This is a very important principle to remember. Cropping a subject at the joint will make them appear amputated.
And on that pleasant thought, we end this guide for posing the arms. If you’ve found some useful information here, be sure to check out our posing guide on hands as they tend to be connected. If you would like to keep updated weekly on our daily new releases, articles, and exclusive specials; sign up for our free updates. We never sell trade or share your information with anyone.
Oh yeah, don’t forget to take a picture today.
“When words become unclear, I shall focus with photographs. When images become inadequate, I shall be content with silence.” ― Ansel Adams
If you enjoyed this article, get email free updates
Article Takeaways
1. Notice that some principles are repeated from other guides. This is intentional as many principles apply to several situations.
2. If you are going to break the rules; you should know exactly why you are breaking the rules.
3. Bare arms and armpits detract from the portrait's focus which should be the eyes.
4. Folded arms should be held slightly away from the body with hands visible.
5. Bring the subject's elbows out and try to create a gap between the arm and the body.
6. Don't crop at the joints, crop between them.